Quick Start
Install KubeAtlas with Helm, open the Web UI, and click through to a dependency graph. About five minutes on a cluster you already have.
If you'd rather drive the CLI directly without deploying anything, skip to the Run modes section in the Developer Guide.
Prerequisites
- Kubernetes 1.26+ — any cluster you control. EKS, AKS, GKE,
OpenShift, k3s, microk8s, Docker Desktop, and
kindall work. If you don't have one,kindv0.22+ on Docker is the fastest local path. kubectlat the same minor version as your cluster.helmv3.
1. Install the chart
The chart is published as an OCI artifact on GHCR. No helm repo add
needed.
helm install kubeatlas oci://ghcr.io/lithastra/charts/kubeatlas \
  --version 1.4.0 \
  --namespace kubeatlas --create-namespace
Defaults are deliberate and conservative:
service.type=ClusterIP(no automatic public exposure)ingress.enabled=false- RBAC ClusterRole hard-coded to
[get, list, watch](read-only) - Pod runs non-root with a read-only root filesystem
persistence.enabled=false(in-memory; opt in to Tier 2 via the persistence guide)
See Helm install options for every value.
2. Wait for readiness
kubectl -n kubeatlas rollout status deploy/kubeatlas
/readyz flips green only after the informer's initial sync is done,
so a green rollout means the in-memory graph is built.
3. Port-forward and open the UI
kubectl -n kubeatlas port-forward svc/kubeatlas 8080:80
Then open http://localhost:8080 in a browser. You should see the Resources page with a namespace dropdown.
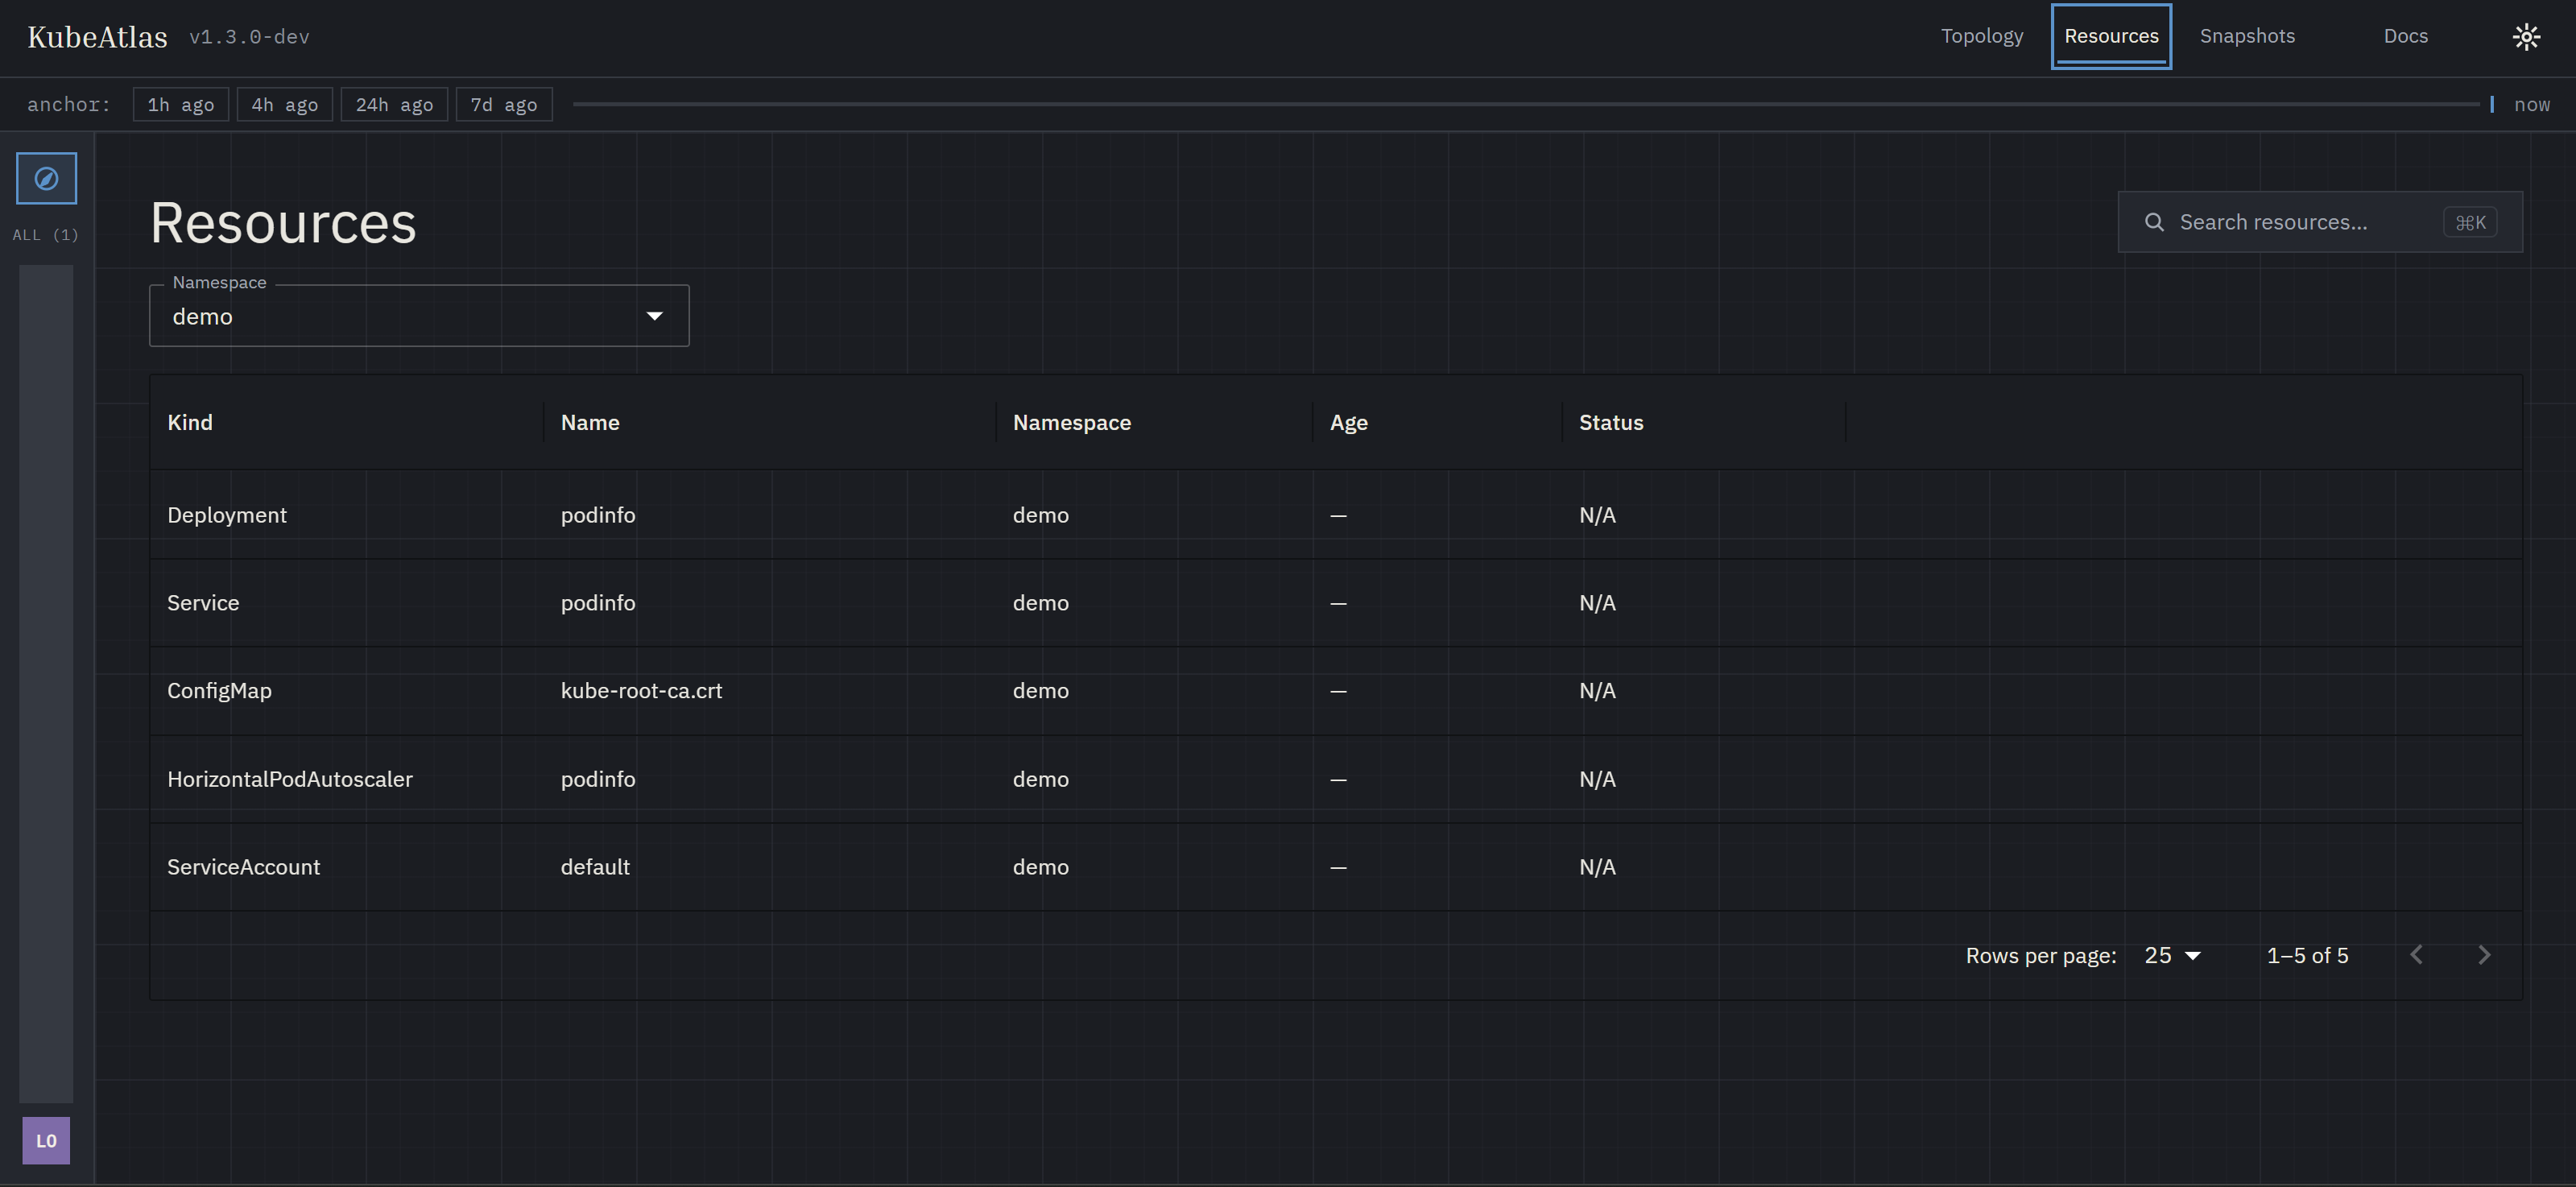
4. Walk the graph
-
Pick a namespace from the dropdown — the table populates with workloads and the configs / SAs / PVCs they reference.
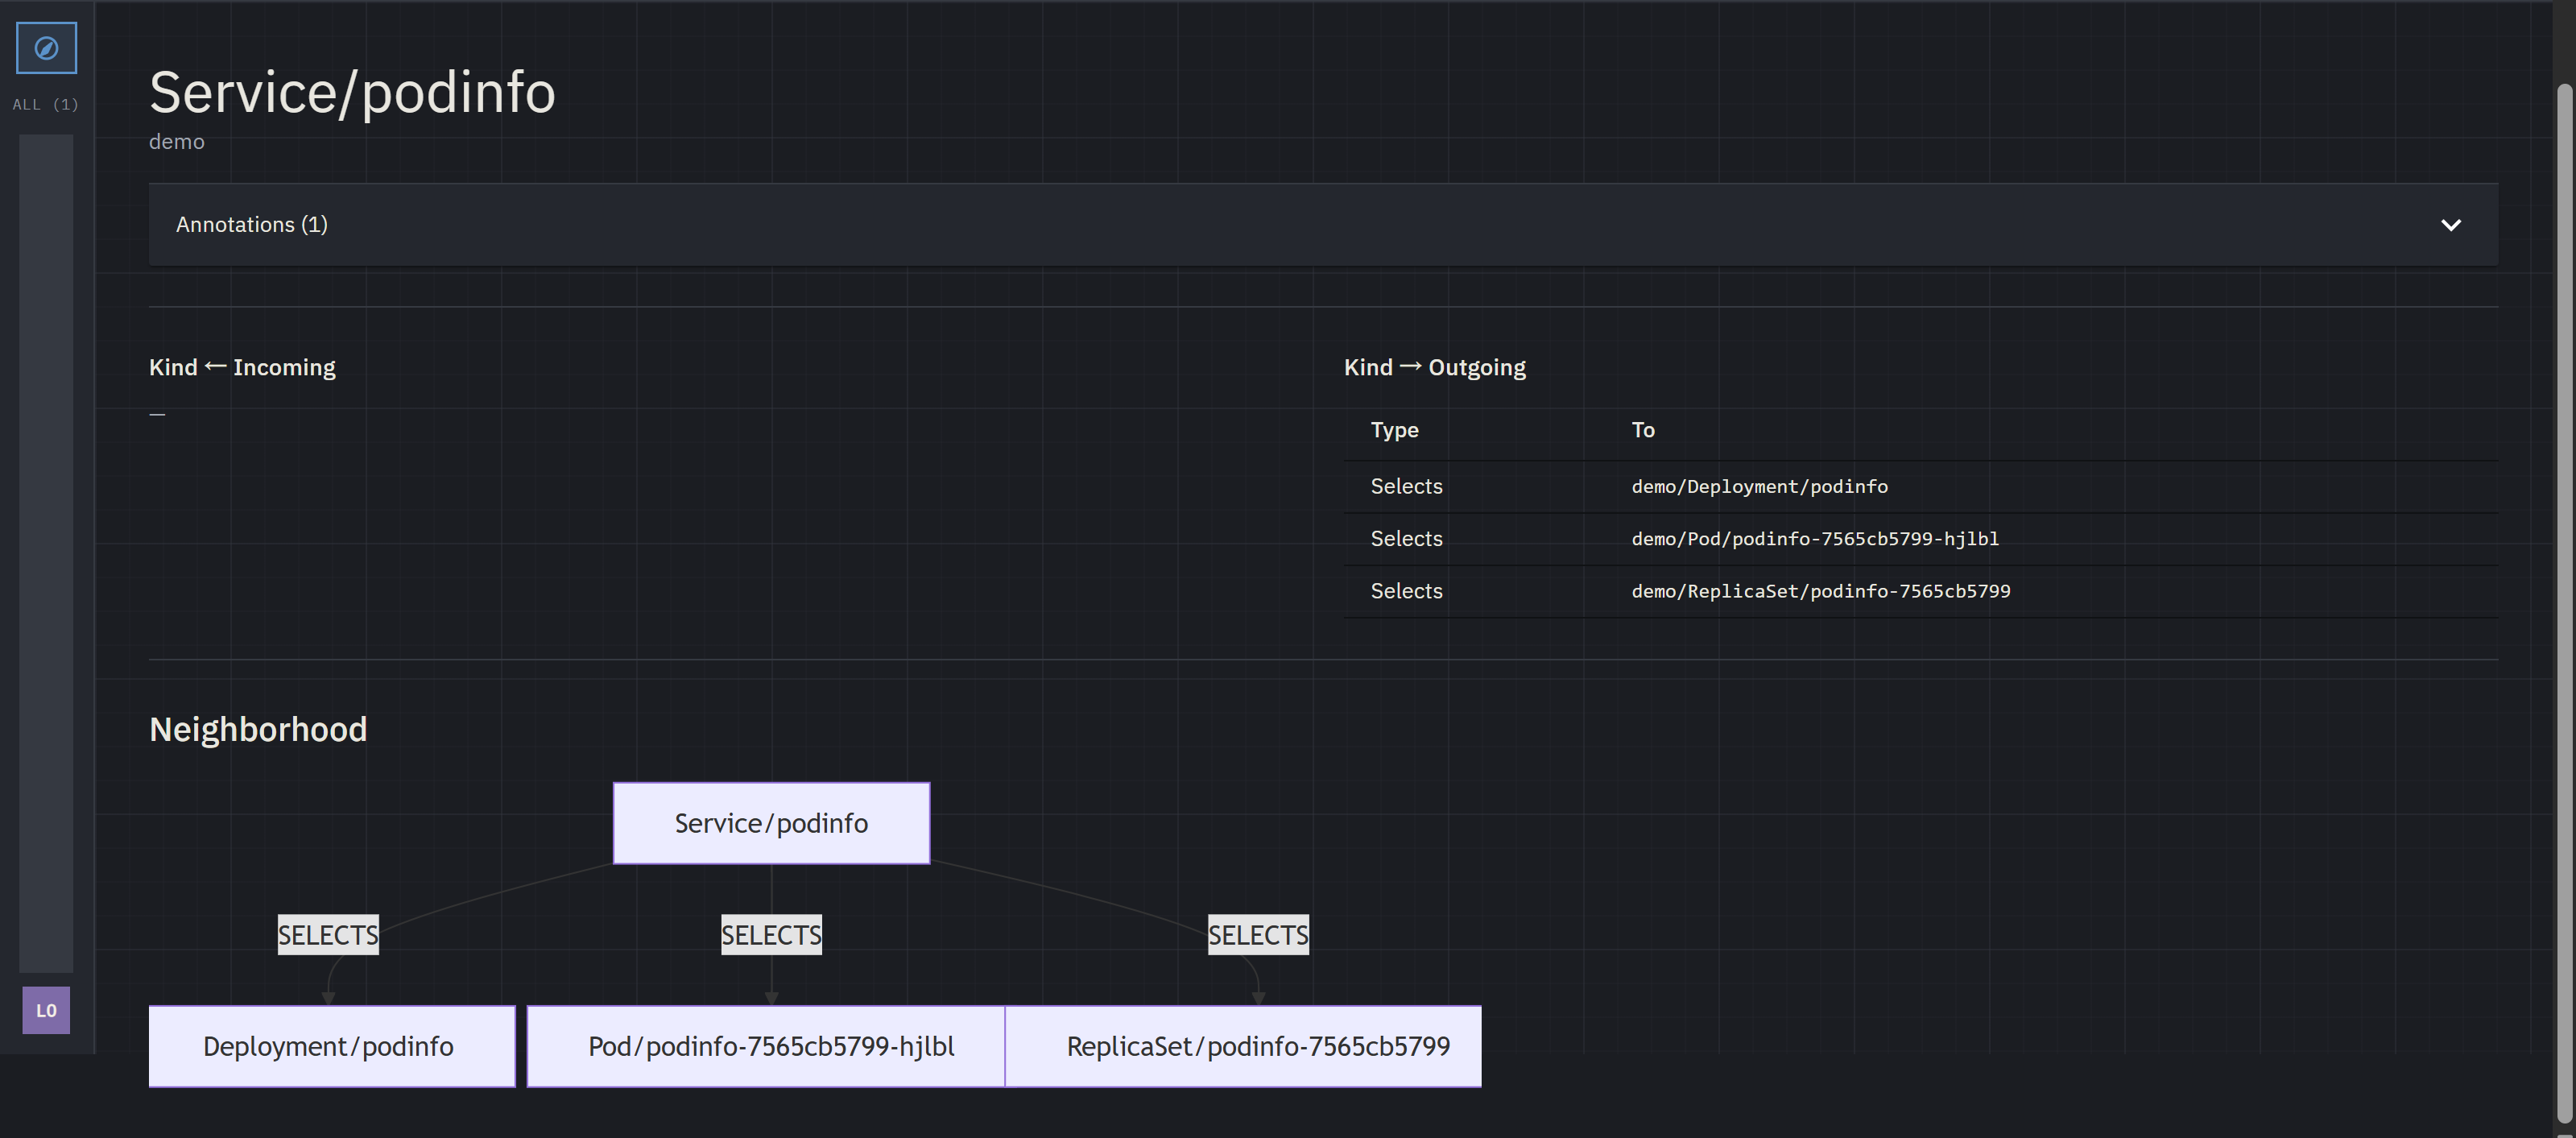
-
Click any row to open the resource detail page. The header shows kind, name, labels, and annotations. Below it, two tables list incoming and outgoing edges. The ten built-in types:
OWNS,USES_CONFIGMAP,USES_SECRET,MOUNTS_VOLUME,SELECTS,USES_SERVICEACCOUNT,ROUTES_TO,ATTACHED_TO,BINDS_SUBJECT,BINDS_ROLE— additional types come from any loaded Rego rule packs. -
The Neighborhood panel at the bottom is a Mermaid flowchart of the resource and its one-hop neighbors.
-
Click Topology in the sidebar for the cluster-wide and namespace-level Cytoscape views.
5. Verify with the API
The same data drives the Web UI and the REST API. While the port-forward is up:
# Cluster summary — one node per namespace.
curl -s http://localhost:8080/api/v1/graph?level=cluster | jq '.nodes | length'

# What depends on this resource?
curl -s http://localhost:8080/api/v1/blast-radius/<ns>/<kind>/<name>

# Health & readiness.
curl -s http://localhost:8080/healthz
curl -s http://localhost:8080/readyz
The /api/v1alpha1/* surface from v0.1.0 is also served, frozen
and CI-enforced — see API versioning
for the dual-surface story. The
API reference has the full endpoint list.
What's next
- Expose the UI safely. The port-forward is fine for trying
KubeAtlas out, but for a team install you'll want an Ingress
fronted by an authentication layer. Read the
security warning before
flipping
ingress.enabled=true, then pick the controller you already run: - Understand the design. The Architecture overview explains the six principles and the data flow.
- Contribute. The Developer Guide has the build/test loop and a worked example of adding a new edge type.
- Plan ahead. The Roadmap lays out where KubeAtlas is going next.